I have to say that Squijoo has absolutely been a life saver when it comes to adding the “fun” touch to my photography business. They have everything you could imagine to make life simpler for photographers. Today I will be teaching you how to take your photo from plain to fun with Squijoo’s awesome Word Art Overlays! It’s very easy and only takes a few minutes!

First, Choose the photo you will be working with.
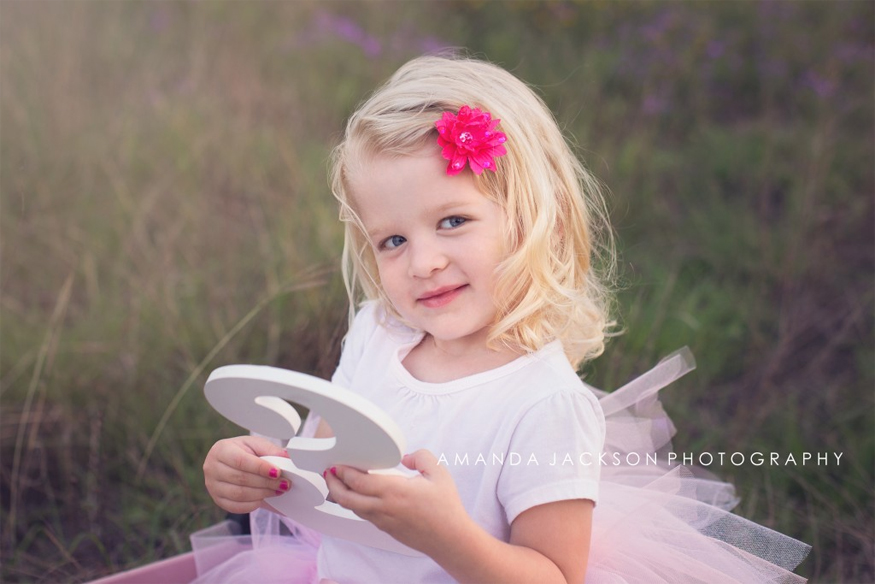
Isn’t miss Kayleigh ADORABLE?! I love this photo of her.
Log on to www.squijoo.com to pick the template you like best. You should be able to find the Word Art Templates by going to “Browse” in the top menu and then going down to “Word Art Stamps”
After you have chosen your template, download it by clicking on “Download Now”.
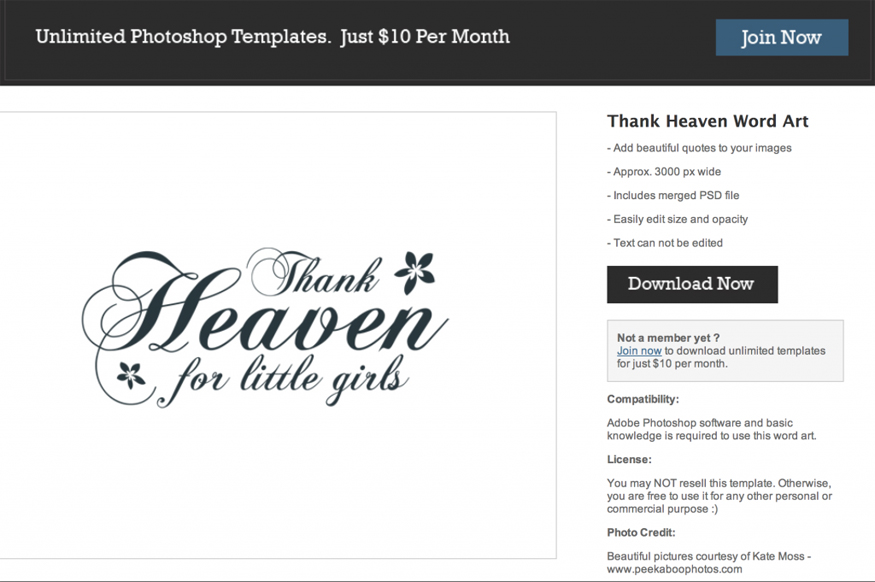
After clicking the “Download Now” button,
If you are not yet loged in to Squijoo, you will be redirected to a page where you can fill out your log in information, and after you click “log in” you will be brought to a screen that looks similar/like this:
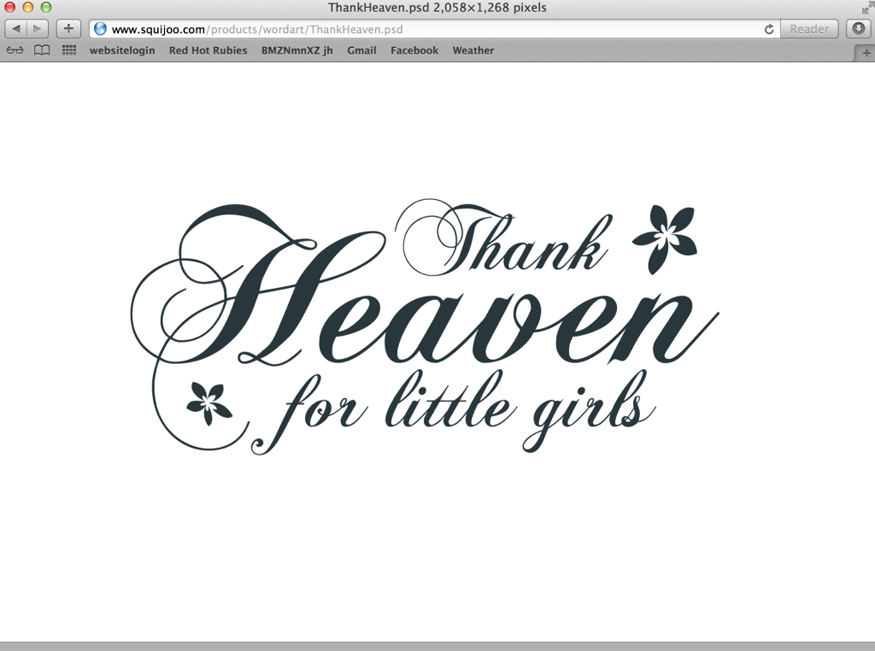
From here, I click on the photo and drag it down to CS6. (I am sure that you can do the same thing if using Photoshop Elements.) This will make the template open in Photoshop. Alternatively, you can save the word art .psd file on your computer and then open it up in Photoshop.
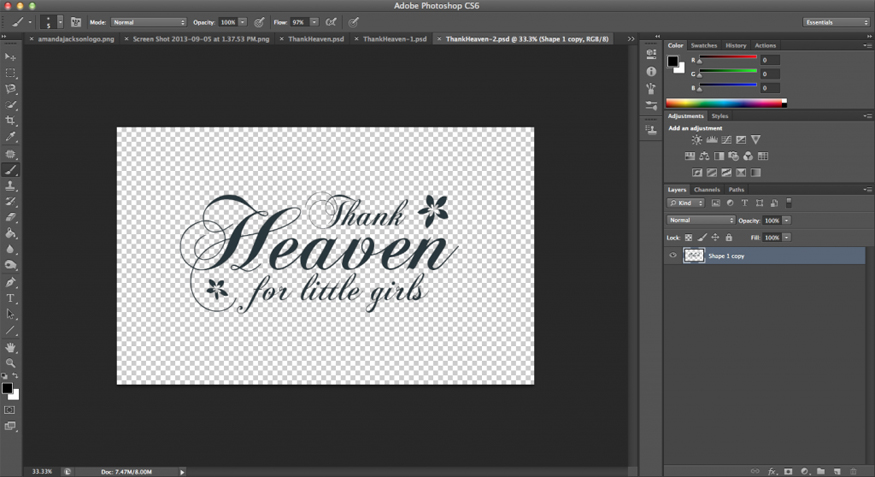
From here, I click on the “move” tool…which is located at the top of your tool bar.

and I drag the photo over to the photo that I am working with. This is what it should look like after dragging the photo over.
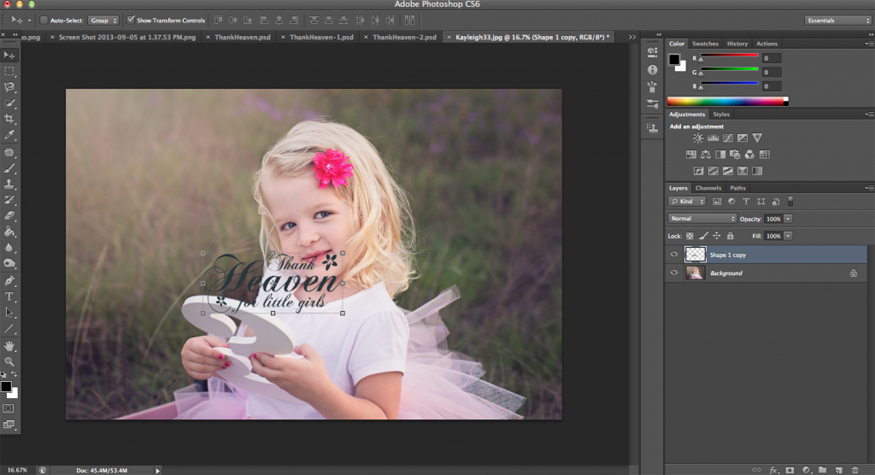
While you still have the “move” tool selected, move the overlay around on your photo until you find the perfect spot for it.
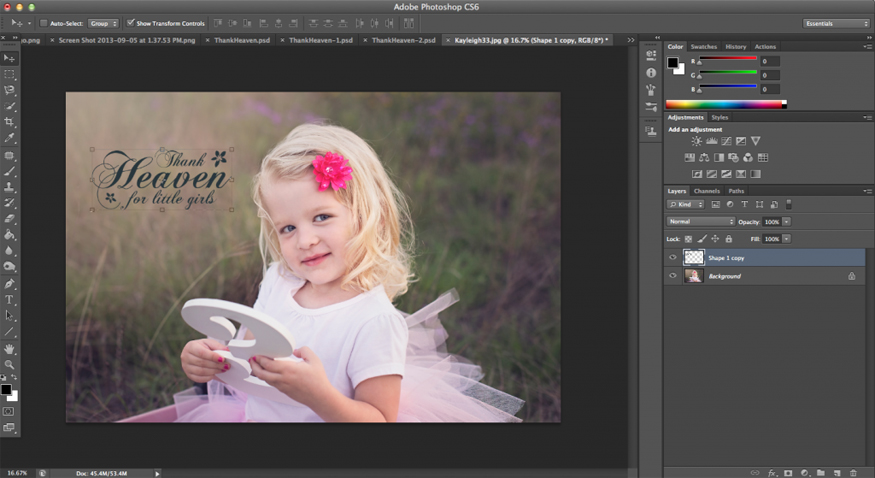
For this particular photo, I think I would like the overlay to be a bit bigger. No big deal, click on “show transform controls” if they aren’t already shown (the button should be on the top)
![]()
and with that selected, you will be able to resize the layer. I usually hold SHIFT key down while I click so I can make sure the proportions stay the same.
(ps: In some versions of Photoshop and Elements holding down SHIFT key is not necessary)
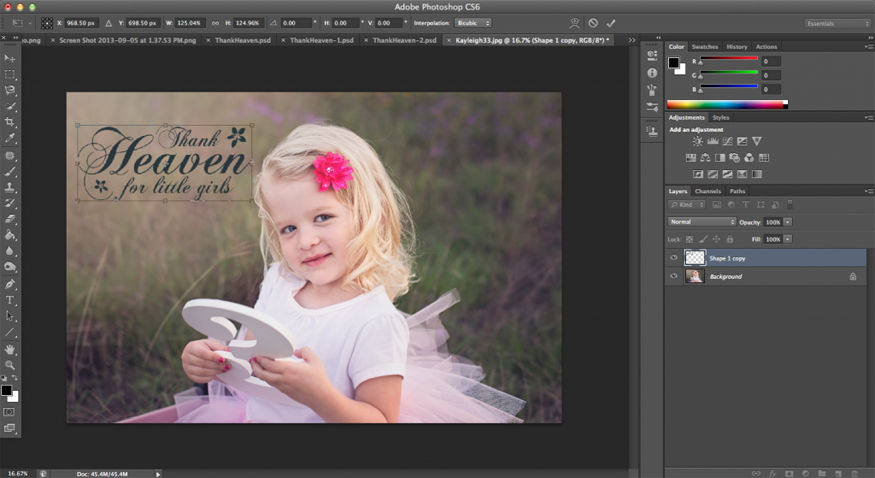
After resizing, click the little check mark up on the top bar to confirm.

If you like it like this, you can stop here.
BUT—That’s not the only thing you can do with these overlays! Now you can use your creativity to make them look how you want them!
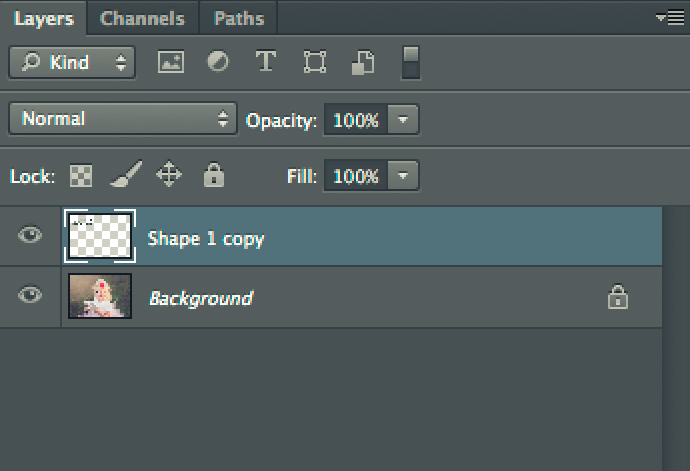
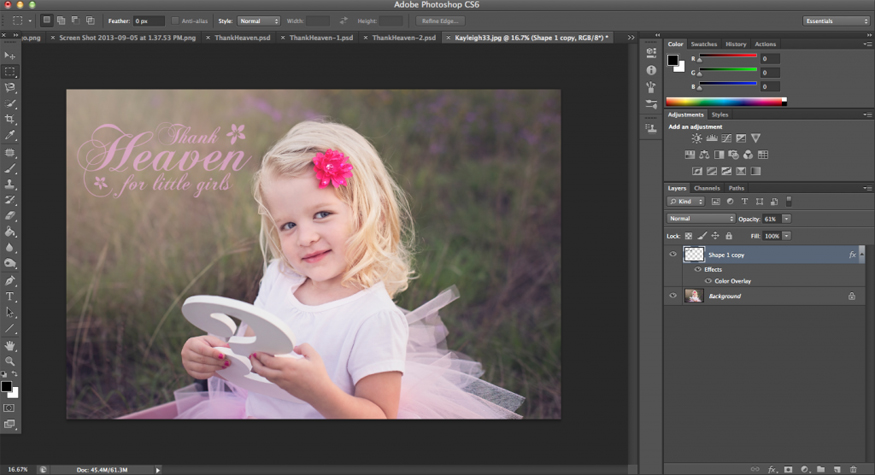
You can change the color of the word art by going over to your “layers” panel and double clicking on the layer.
It will bring up a box that looks like this.
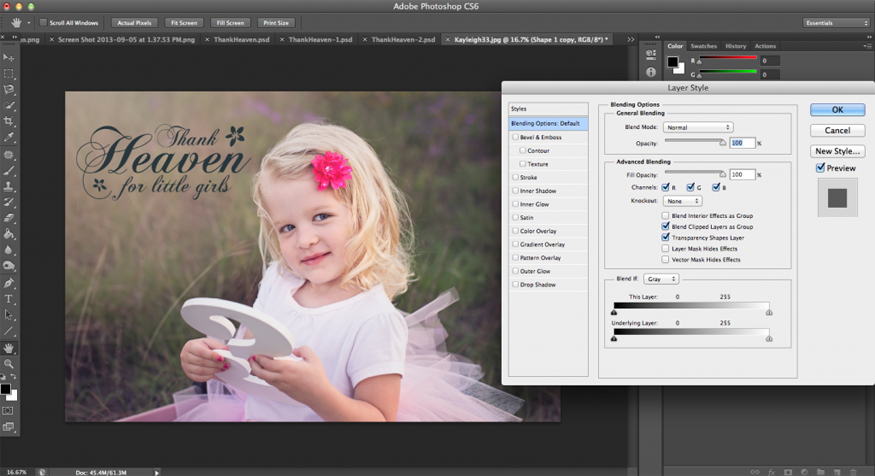
Click on “Color Overlay” on the left hand menu bar.

It will bring up a box like this. Double click on the red rectangle right next to where it says “Blending Mode”
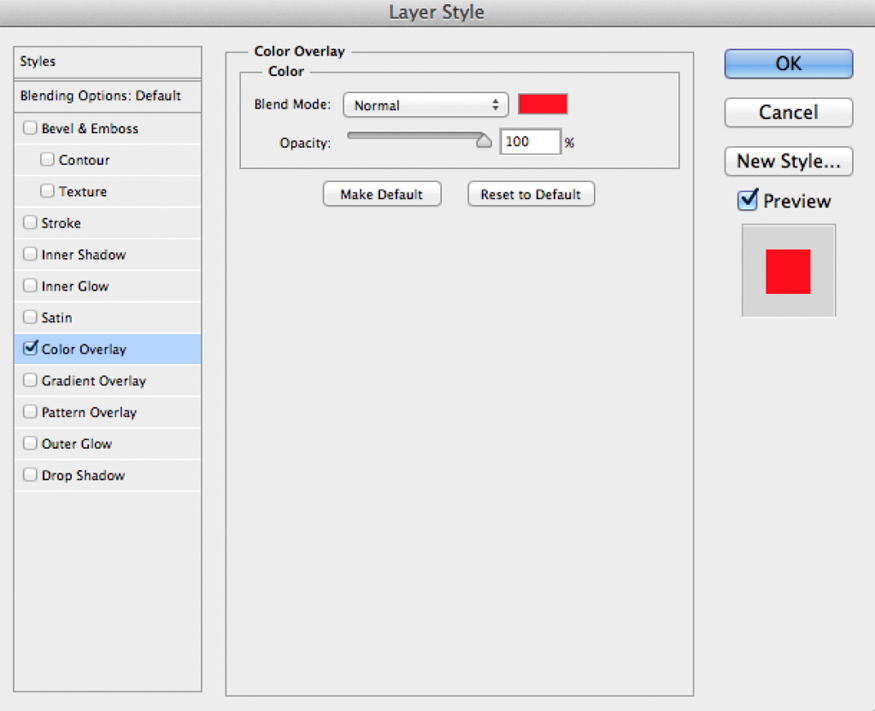
It will bring up a box that looks like this where you can choose whatever color you think would look great! I am going to choose a light pink.
Once you choose your color, click “OK” on both Boxes to bring you back to your photo.
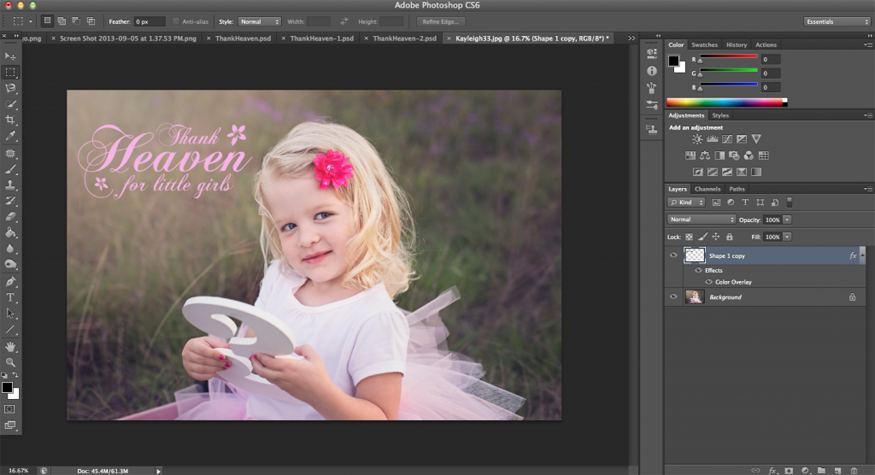
You can stop here if you like…but I think that I am going to change the opacity of the overlay to make it not “stand out” so much. To do that, go over to your layers panel and select the layer that you want to change the opacity of. In my case it is “Shape 1 copy”
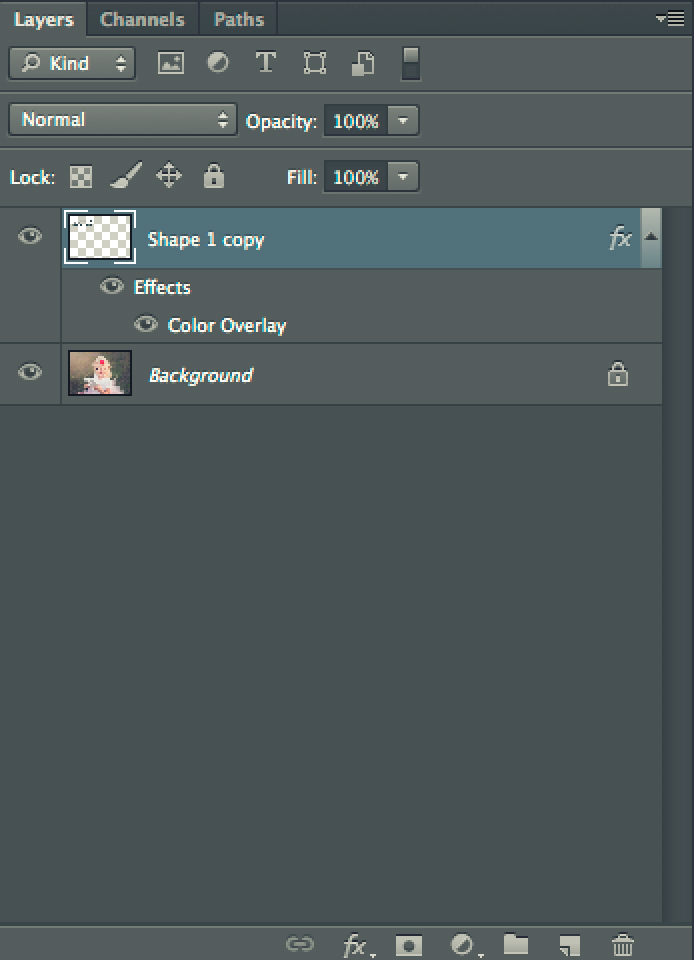
Right above there is a spot where it says “Opacity 100%” You can change it to whatever opacity you want. I am going to put it on about 61%…but you can do whatever you want! Use your creativity and make it your own!![]()
Another fun thing you can do is add a “drop shadow” to make the word art seem like it is popping away from the image. To do that, double click on the layer again like we did with the color to bring up this box.
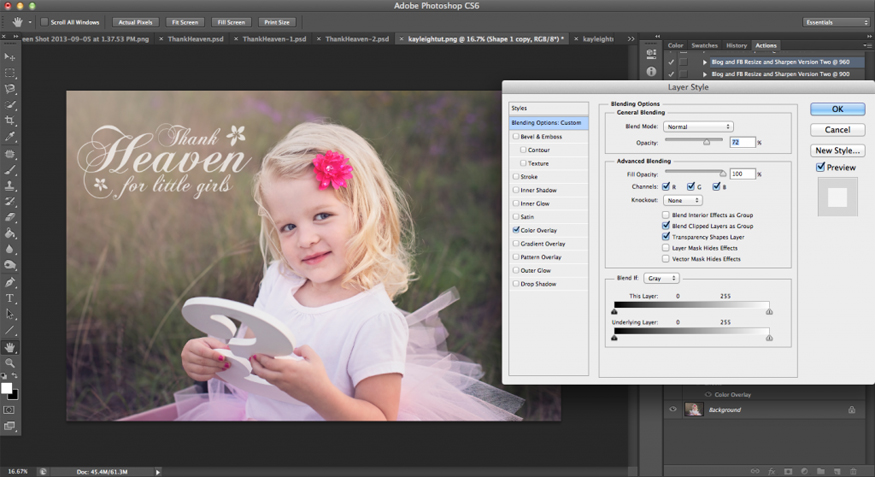
This time, instead of clicking on “Color Overlay”, you’re going to click on “Drop Shadow”

You can now adjust the settings to make a shadow pop up on your photo like this:
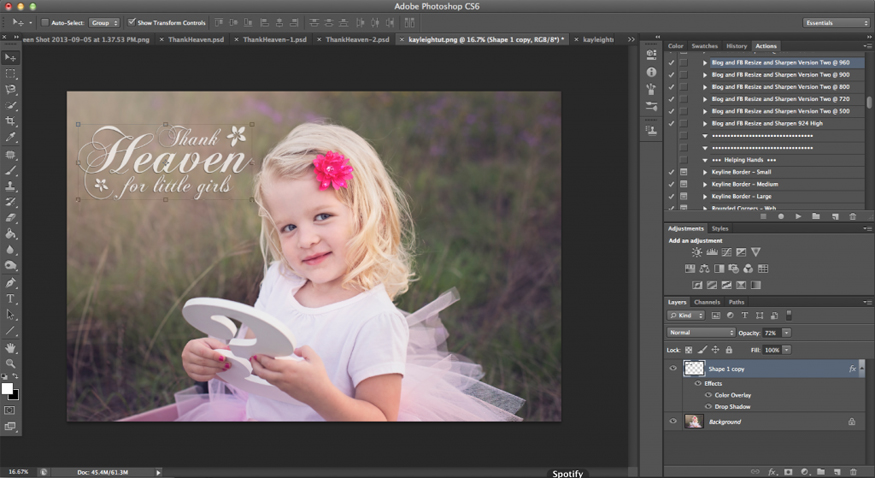
Feel free to play around with it until it’s just right! You can do many different things with it and make it look different every single time!
Here is my finished product after playing a little bit more!![]() I decided to change the word art to white instead to make it pop a little bit more! The possibilities are endless!
I decided to change the word art to white instead to make it pop a little bit more! The possibilities are endless!

Thanks for reading! Happy Word Art-ing!
To Change Word Art Color In Photoshop Elements
Select your word art layer >> Go to Enhance >> Adjust Color >> Adjust Hue/Saturation >> Check the “Colorize” box and then play with the dials to get the exact color you want.

Is there any way to add wording to it???? I am trying to add the last name and year for a custom USB drive?