All our templates are created in Adobe Photoshop. You must have Photoshop or Photoshop Elements installed on your computer. A basic working knowledge of using Photoshop is required to implement the instructions below.
1. Inserting your own photos and images
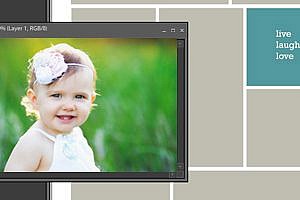
a) Open up the template and the photographs you would like to use in your Photoshop software.
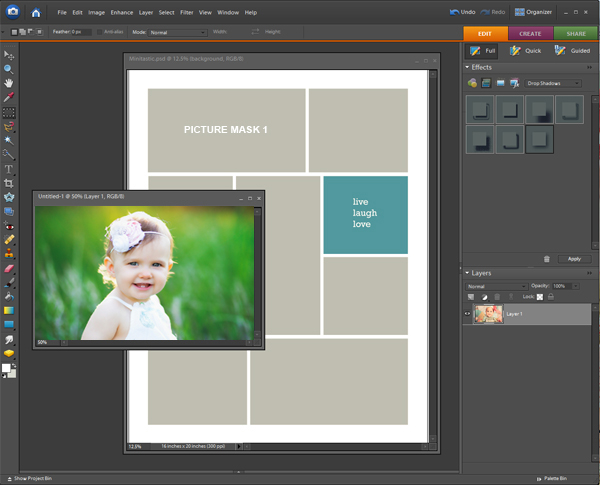
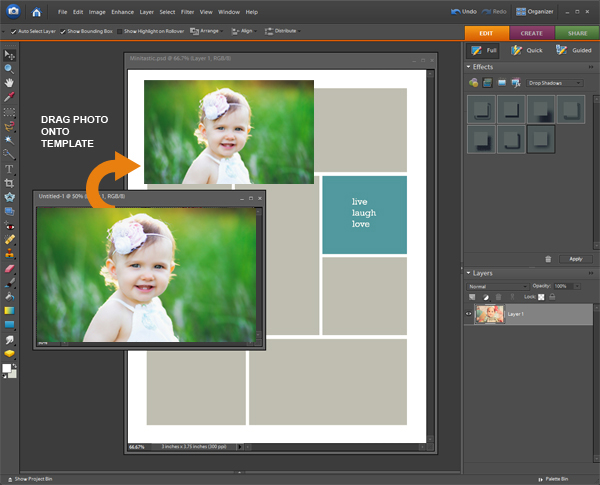
b) Using the move tool, drag and place your photo directly over the “picture mask” layer. It is helpful to resize your photo to the approximate dimensions of the picture mask layer (keep it slightly larger than the opening).
Very important: Make sure that your photo is directly ONE layer on top of the layer named “picture mask”. The best way to do this is to first select the “picture mask” layer in your template >> then go to your photo and drag it into the template.
c) To insert the photo into the picture mask opening:
– PC Users: press Control+G (Photoshop CS and earlier) or Control+Alt+G (Photoshop CS2 and newer)
– Mac Users: press Command+G (Photoshop CS and earlier) or Command+Option+G (Photoshop CS2 and newer)
The photo will automatically “clip” hiding any part of the photo that goes beyond the photo opening shape.
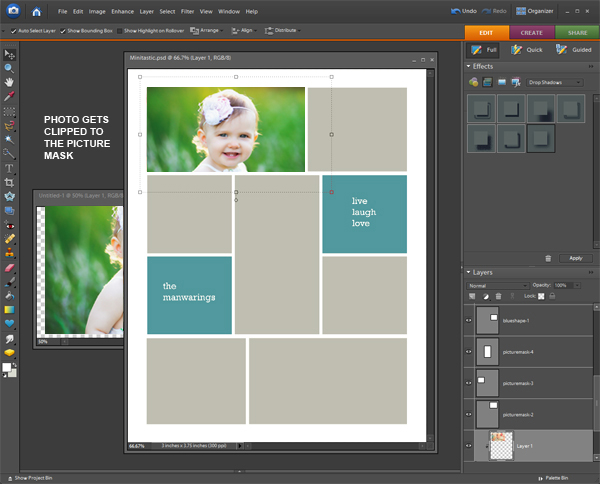
d) Making sure that the photo layer is selected, you can now free transform and resize the photo to suit your needs. Hold down the shift key to keep your proportions while you drag a corner to adjust the size of the photo. Using the move tool you can position the photo to exactly where you want it in the opening.
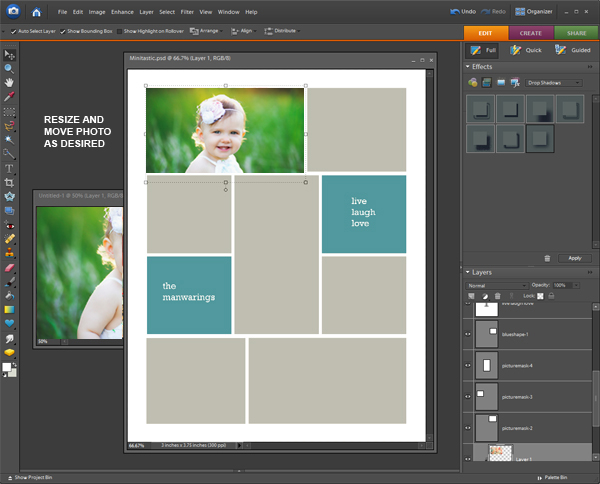
e) Repeat these steps for any other picture mask layers ( if more than one photo openings are available)
2. Changing Text
a) Download fonts from links provided in template folder and then install to your computer before editing any text. (see how to install fonts)
b) Change any text using the text type tool (T)
c) The color of text can also be changed using the color picker tool.

3. Changing Colors
Changing colors of layers in the template can be achieved one of two ways:
a) Select the layer you want to edit. Set the foreground color on your color picker tool.
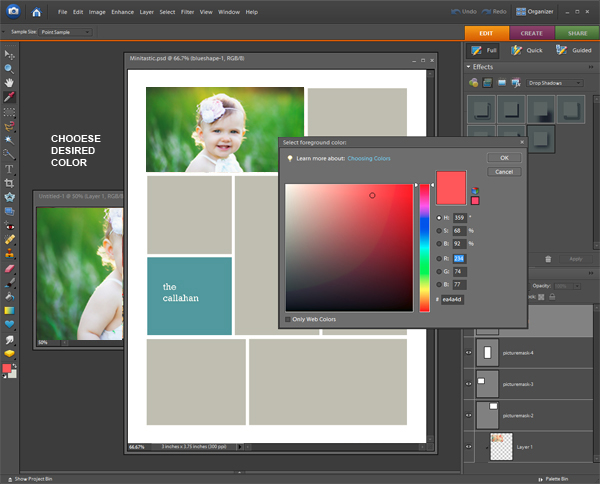
b) Use the paint bucket to fill in the new color.

c) In some cases you will not be able to edit colors using the method above. In that case you can use the “Adjust Hue/Saturation” tool. ( Please note that some layers in our templates are fixed patterns and those colors can not be edited.)
4. Getting Your Templates Printed
Once you have the template the way you want it to look, follow these steps to prepare files for printing
a) Make sure everything is in place using the “guide” layer to check for trim lines etc.
b) Once you’re happy with the layout DELETE the “guide” layer before saving.
c) Save the template as a psd file (in case you need to edit or reuse).
d) Flatten the image and save as a JPEG file.
e) Send the flattened JPEG file off to your printing lab.
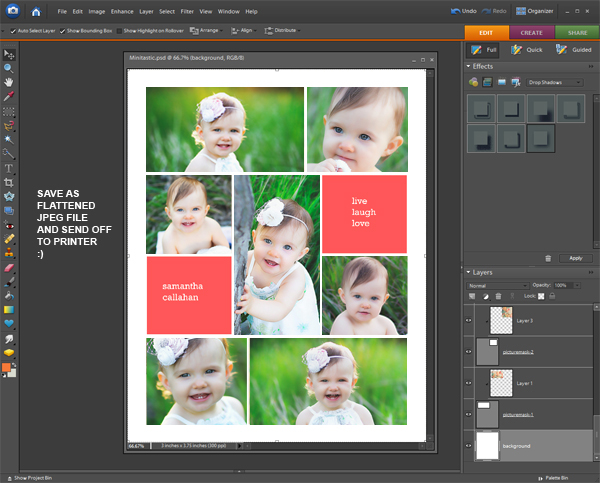
Most of our templates are designed with Miller’s Lab specifications. However, you are free to get them printed anywhere you like. Please be sure to check with your printer for compatibility before ordering any prints.
When I try to open a template in photoshop, I get a notification saying that it isn’t the right kind of document. What am I doing wrong? I opened it as a PSD file.
Make sure you’re opening the files inside the folder that you downloaded and NOT the folder itself. Unzip the folder and then open the template files inside.
If you’re sure you’re trying to open the files then try this. Open your Photoshop software first and go to File> Open and make sure you have “All Formats” in the “Files of type” window. Then chose the file to open and see if that works.
I can not figure out how to add pictures to picture mask! I am using element..
Very helpful! Thank you … I just joined Squijoo and I’m loving the templates